建筑结构的准备 - 附加楼层和内部楼层:修订间差异
无编辑摘要 标签:手工回退 |
|||
| (未显示2个用户的54个中间版本) | |||
| 第6行: | 第6行: | ||
|p4 =<!--gdy jest kolejny produkt handlowy, zamienić na->"produkt_handlowy3="--> | |p4 =<!--gdy jest kolejny produkt handlowy, zamienić na->"produkt_handlowy3="--> | ||
|category1 =InstalSystem 5#Funkcjonalności | |category1 =InstalSystem 5#Funkcjonalności | ||
|category_name1 = | |category_name1 =功能和工具 | ||
|c2 =<!--Jest kategoria -> zamienić na: "category2=" i uzupełnić link do sekcji kategorii na stronie głównej produktu--> | |c2 =<!--Jest kategoria -> zamienić na: "category2=" i uzupełnić link do sekcji kategorii na stronie głównej produktu--> | ||
|category_name2 =<!--podać nazwę kategorii "ZASTOSOWANIE"/"FUNKCJONALNOŚĆ"/...--> | |category_name2 =<!--podać nazwę kategorii "ZASTOSOWANIE"/"FUNKCJONALNOŚĆ"/...--> | ||
| 第22行: | 第22行: | ||
==在程序中的位置== | ==在程序中的位置== | ||
===<IS_TS id=StoreyManagement/>=== | ===<IS_TS id=StoreyManagement/>=== | ||
* ''<IS_TS id=StoreyManagement/>'' 位于''<IS_TS id=rsDanogi/>'' 窗口,''<IS_TS id=btDaneBudynku/>'' 选型中。[[File: | * ''<IS_TS id=StoreyManagement/>'' 位于''<IS_TS id=rsDanogi/>'' 窗口,''<IS_TS id=btDaneBudynku/>'' 选型中。[[File:楼层管理_附加楼层和内部楼层1.png |900 px|left|thumb|1. <IS_TS id=StoreyManagement/>.]]<br clear="all"/> | ||
===导入底图=== | ===导入底图=== | ||
* 与''<IS_TS id=lystrGraphicBackground/>'' 相关的工具和功能,位于''<IS_TS id=GraphicalEdit/>'' 窗口,并进入''<IS_TS id=lystrGraphicBackground/>'' 编辑范围,在''<IS_TS id=NarzedziaGlowne/>'' 选项卡,''<IS_TS id=lystrGraphicBackground/>'' 工具栏中。<br/>[[File: | * 与''<IS_TS id=lystrGraphicBackground/>'' 相关的工具和功能,位于''<IS_TS id=GraphicalEdit/>'' 窗口,并进入''<IS_TS id=lystrGraphicBackground/>'' 编辑范围,在''<IS_TS id=NarzedziaGlowne/>'' 选项卡,''<IS_TS id=lystrGraphicBackground/>'' 工具栏中。<br/>[[File:附加楼层 底图工具.png|900 px|left|thumb|2. <IS_TS id=lystrGraphicBackground/>.]]<br clear="all"/> | ||
===建筑结构=== | ===建筑结构=== | ||
* 与''<IS_TS id=ScopeKonstrukcjaBudynku/>'' 相关的工具和功能,位于''<IS_TS id=GraphicalEdit/>'' 窗口,并进入''<IS_TS id=lystrFloors/>'' 编辑范围,在''<IS_TS id=NarzedziaGlowne/>'' 选项卡,''<IS_TS id=lystrFloors/>'' 工具栏中。</br>[[File: | * 与''<IS_TS id=ScopeKonstrukcjaBudynku/>'' 相关的工具和功能,位于''<IS_TS id=GraphicalEdit/>'' 窗口,并进入''<IS_TS id=lystrFloors/>'' 编辑范围,在''<IS_TS id=NarzedziaGlowne/>'' 选项卡,''<IS_TS id=lystrFloors/>'' 工具栏中。</br>[[File:附加楼层 建筑工具.png|900 px|left|thumb|3. <IS_TS id=ScopeKonstrukcjaBudynku/>.]]<br clear="all"/> | ||
===建筑结构的计算=== | ===建筑结构的计算=== | ||
* ''<IS_TS id=BuildingStructureCalculation/>'' ,位于''<IS_TS id=NarzedziaGlowne/>'' 选项卡,''<IS_TS id=sObliczenie/>'' 工具栏中。<br/>[[File: | * ''<IS_TS id=BuildingStructureCalculation/>'' ,位于''<IS_TS id=NarzedziaGlowne/>'' 选项卡,''<IS_TS id=sObliczenie/>'' 工具栏中。<br/>[[File:附加楼层 建筑结构的计算工具.png |900 px|left|thumb|4. ''<IS_TS id=BuildingStructureCalculation/>'']]<br clear="all"/> | ||
==应用举例== | ==应用举例== | ||
=== | ===场景一:使用手动房间,创建带有附加楼层和内部楼层的简化建筑结构=== | ||
====创建主楼层==== | ====创建主楼层==== | ||
{{Info}}[[建筑结构的准备#创建建筑的楼层|创建建筑的楼层]]。 | {{Info}}[[建筑结构的准备#创建建筑的楼层|创建建筑的楼层]]。 | ||
==== | ====创建附加楼层和内部楼层==== | ||
主楼层标高是创建用于进一步设计的附加楼层或内部楼层工作表的基础。指定给主楼层的附加楼层或内部楼层,将保留在与主楼层同一楼层上,但给出了额外的楼层标高。<br/> 创建带有不同楼层的简化建筑结构的功能位于''<IS_TS id=rsDanogi/>'' 窗口,''<IS_TS id=btDaneBudynku/>'' ,''<IS_TS id=StoreyManagement/>'' 中: | |||
* ''<IS_TS id=AddNewStoreyLevel/>''; | * ''<IS_TS id=AddNewStoreyLevel/>''; | ||
* ''<IS_TS id=AddInternalStoreyLevel/>''. | * ''<IS_TS id=AddInternalStoreyLevel/>''. | ||
| 第48行: | 第48行: | ||
* 为''<IS_TS id=AdditionalStoreyLevel/>'' 设定:''<IS_TS id=RzednaSzczytuDachuCaption/>'' ; | * 为''<IS_TS id=AdditionalStoreyLevel/>'' 设定:''<IS_TS id=RzednaSzczytuDachuCaption/>'' ; | ||
* 为''<IS_TS id=AdditionalStoreyLevel/>'' 设定:''<IS_TS id=strLblWysokoscKondygnacjiCaption/>'' 。 | * 为''<IS_TS id=AdditionalStoreyLevel/>'' 设定:''<IS_TS id=strLblWysokoscKondygnacjiCaption/>'' 。 | ||
使用''<IS_TS id=sBtnKopiujCaption/>'' | 使用''<IS_TS id=sBtnKopiujCaption/>'' 功能复制主楼层,也会复制该楼层上创建的附加楼层和内部楼层,使用''<IS_TS id=AddNewStoreyAbove/>'' / ''<IS_TS id=AddNewStoreyBelow/>'' 功能,仅创建新的主楼层,然后可再创建新的附加楼层或内部楼层。<br/>''''' 注意:'''''创建的楼层可以单独删除,也可以与主楼层一起删除。<br/>[[File:附加楼层和内部楼层的创建封面.png|900 px|left|thumb|'''[[视频:附加楼层和内部楼层的创建]]'''|link=https://www.bilibili.com/video/BV1yq421F79U?t]] <br clear="all"/> 如果有必要,可在''<IS_TS id=DataEditorTable/>'' 窗口,修改如下参数: | ||
如果有必要,可在''<IS_TS id=DataEditorTable/>'' 窗口,修改如下参数: | |||
* 楼层的''<IS_TS id=stringTypElementu/>''; | * 楼层的''<IS_TS id=stringTypElementu/>''; | ||
* ''<IS_TS id=CiagPodpoziomow/>'' - <IS_TS id=CiagPodpoziomowHint/>.<br/> | * ''<IS_TS id=CiagPodpoziomow/>'' - <IS_TS id=CiagPodpoziomowHint/>.<br/>[[File:2. 内部楼层和附加楼层类型的修改和位置的调整封面.png|900 px|left|thumb|'''[[视频:InstalSystem 5 - 内部楼层和附加楼层类型的修改和位置的调整]]'''|link=https://www.bilibili.com/video/BV1BZ421Y7Mw?t]] <br clear="all"/> <br clear="all"/> | ||
====<IS_TS id=btImportujPodkladZPlikuDXF/>==== | ====<IS_TS id=btImportujPodkladZPlikuDXF/>==== | ||
| 第59行: | 第58行: | ||
{{Info}} [[建筑结构的准备 - 房间布置图]]</br> | {{Info}} [[建筑结构的准备 - 房间布置图]]</br> | ||
* 在楼层列表中选择要将房间插入到主楼层、附加楼层,还是内部楼层; | * 在楼层列表中选择要将房间插入到主楼层、附加楼层,还是内部楼层; | ||
* 插入''<IS_TS id=iNameKonstrPomieszczenie/>''。<br/> '''注:''' 位于当前所选楼层标高之上的房间将用:绿色指示器[[File:Green indicator.png|30 px|]] | * 插入''<IS_TS id=iNameKonstrPomieszczenie/>''。<br/> '''注:''' 位于当前所选楼层标高之上的房间将用:绿色指示器[[File:Green indicator.png|30 px|]] 进行图形标记,而位于当前楼层标高之下的房间将用红色指示器[[File:Red indicator.png|30 px|]] 进行标记。<br/>[[File:在内部楼层和附加楼层上绘制房间封面.png|900 px|left|thumb|'''[[视频:InstalSystem 5 - 在内部楼层和附加楼层上绘制房间]]'''|link=https://www.bilibili.com/video/BV1sD421n7nG?t]] <br clear="all"/> <br clear="all"/> | ||
* 如果有必要,可在其''<IS_TS id=DataEditorTable/>'' 中,通过指定''<IS_TS id=OdKondygnacji/>''/''<IS_TS id=Dokondygnacji/>'' 来更改它在主楼层、附加楼层或内部楼层中的''<IS_TS id=pcstrXY/>'' 。<br/> | * 如果有必要,可在其''<IS_TS id=DataEditorTable/>'' 中,通过指定''<IS_TS id=OdKondygnacji/>''/''<IS_TS id=Dokondygnacji/>'' 来更改它在主楼层、附加楼层或内部楼层中的''<IS_TS id=pcstrXY/>'' 。<br/>[[File:在参数表中修改房间的位置封面.png|900 px|left|thumb|'''[[视频:InstalSystem 5 - 内部楼层和附加楼层类型的修改和位置的调整]]'''|link=https://www.bilibili.com/video/BV1UC411G7Gs?t]] <br clear="all"/> <br clear="all"/> | ||
===场景二:使用<IS_TS id=ObrysBud/>和<IS_TS id=rpGenerowanieKonstrukcji/>创建带有附加和内部楼层的完整的建筑结构=== | ===场景二:使用<IS_TS id=ObrysBud/>和<IS_TS id=rpGenerowanieKonstrukcji/>创建带有附加和内部楼层的完整的建筑结构=== | ||
| 第67行: | 第66行: | ||
====创建附加楼层和内部楼层==== | ====创建附加楼层和内部楼层==== | ||
所执行步骤与上文 [[建筑结构的准备 - 附加楼层和内部楼层#创建附加和内部楼层|场景一:使用手动房间,创建带有附加和内部楼层的简化建筑结构]] 所执行的步骤相同。 | |||
====<IS_TS id=btImportujPodkladZPlikuDXF/>==== | ====<IS_TS id=btImportujPodkladZPlikuDXF/>==== | ||
| 第75行: | 第74行: | ||
{{Info}} [[建筑结构的准备 - 房间布置图]]</br> | {{Info}} [[建筑结构的准备 - 房间布置图]]</br> | ||
====插入 <IS_TS id=ObrysBud/>==== | ====插入 <IS_TS id=ObrysBud/>==== | ||
{{Info}} [[建筑结构的准备 - 完整的建筑结构# | {{Info}} [[建筑结构的准备 - 完整的建筑结构#插入建筑外轮廓|插入建筑外轮廓]]</br> | ||
''<IS_TS id=ObrysBud/>'' 的''<IS_TS id=pcstrXY/>'' 基于主楼层的标高。 | |||
====<IS_TS id=PartitionsGenerator/>==== | ====<IS_TS id=PartitionsGenerator/>==== | ||
* | * 当进入''<IS_TS id=lystrFloors/>'' 编辑器时, 在''<IS_TS id=NarzedziaGlowne/>'' , ''<IS_TS id=rpGenerowanieKonstrukcji/>'' 工具栏中可找到 ''<IS_TS id=PartitionsGenerator/>'' 功能。 它可通过所设计的房间和建筑的外轮廓由程序识别出建筑的空间来创建建筑的围护结构。</br>[[File:附加楼层_建筑生成器.png|900 px|left|thumb|5. <IS_TS id=PartitionsGenerator/>]]<br clear="all"/> | ||
* | * 使用''<IS_TS id=rpPodzialElementowKonstrukcji/>'' 功能,并在''<IS_TS id=rpLiniaPomocnicza/>'' 工具的支持下分割建筑结构图元(楼板、墙体或屋顶)。''<IS_TS id=rpLiniaPomocnicza/>'' 允许指定基准线和其他捕捉点。 ''<IS_TS id=rpPodzialElementowKonstrukcji/>'' 是创建附加楼层和内部楼层的主要工具。其执行的正确性将取决于创建所需建筑结构的进一步路径的正确性; | ||
* | * 对于楼板,更改''<IS_TS id=StoreyLevel/>'' 中的楼层基准,对于墙体,更改 ''<IS_TS id=StoreyLevelFrom/>'', ''<IS_TS id=StoreyLevelTo/>'' ,对于要修改的屋顶,删除后重新绘制。[[File:6._附加楼层_建筑部件的切割视频封面.png|900 px|left|thumb|'''[[视频:InstalSystem 5 - 分割建筑部件,调整分割后建筑部件的标高和位置参数]]'''|link=https://www.bilibili.com/video/BV16Z421n7tF?t]] <br clear="all"/> <br clear="all"/> '''注意:''' 不建议在连接处分隔墙。如果有这种情况,最佳方法是在连接处取消墙的连接,先指定墙的位置,然后再连接墙; | ||
* | * 使用''<IS_TS id=CorrectWallConnections/>'' 功能。</br>[[File:附加楼层 修改墙的的连接.png|900 px|left|thumb|6. <IS_TS id=CorrectWallConnections/>]]<br clear="all"/> '''注意:''' 我们强烈建议使用此功能,特别是在连接不同标高的墙的情况下。 | ||
* | * 如有必要:调整建筑构件,更改形状。 | ||
====<IS_TS id=BuildingStructureCalculation/>==== | ====<IS_TS id=BuildingStructureCalculation/>==== | ||
进行''<IS_TS id=BuildingStructureCalculation/>'' ,计算完成后,就可识别出由围护结构部件所包围的面积内所创建的所有''<IS_TS id=rsPomieszczenie/>'' ''<IS_TS id=PomieszczenieAutomatyczne/>'' 。</br>{{Info}} [[建筑结构的准备 - 完整的建筑结构#建筑结构计算|建筑结构计算]]。 | |||
====在墙上插入窗、门和墙洞==== | |||
在选择了正确的楼层平面后,插入必要的子隔墙(窗、门、墙洞等)。所有插入的部件都有一个与当前所选楼层平面相关的标高。</br>{{Info}} [[建筑结构的准备 - 完整的建筑结构#插入窗, 门和墙上开洞|插入窗, 门和墙上开洞]]。</br></br> | |||
===场景三:使用手动创建的分区,创建带有附加楼层和内部楼层的完整建筑结构=== | |||
====创建主楼层==== | |||
{{Info}}[[建筑结构的准备#创建建筑的楼层|创建建筑的楼层]]。 | |||
==== | ====创建附加楼层和内部楼层==== | ||
所执行步骤与上文 [[建筑结构的准备 - 附加楼层和内部楼层#创建附加和内部楼层|场景一:使用手动房间,创建带有附加和内部楼层的简化建筑结构]] 所执行的步骤相同。 | |||
====<IS_TS id=btImportujPodkladZPlikuDXF/>==== | ====<IS_TS id=btImportujPodkladZPlikuDXF/>==== | ||
{{Info}} [[ | {{Info}} [[导入底图文件|导入底图文件]]<br/> | ||
====插入围护结构==== | |||
在所选则的楼层平面上插入围护结构 (''<IS_TS id=MainStoreyLevel/>'', ''<IS_TS id=AdditionalStoreyLevel/>'' 或''<IS_TS id=AdditionalInternalStoreyLevel/>'')。所有插入部件均带有基于所选楼层的标高。 | |||
* 插入墙。{{Info}} [[建筑结构的准备 - 完整的建筑结构#插入墙|插入墙]]<br/> | |||
* 插入楼板。{{Info}} [[建筑结构的准备 - 完整的建筑结构#插入楼板|插入楼板]]。<br/> | |||
* 插入屋顶。{{Info}} [[建筑结构的准备 - 完整的建筑结构#插入屋顶|插入屋顶]]。<br/> | |||
====<IS_TS id=BuildingStructureCalculation/>==== | ====<IS_TS id=BuildingStructureCalculation/>==== | ||
进行''<IS_TS id=BuildingStructureCalculation/>'' ,计算完成后,就可识别出由围护结构部件所包围的面积内所创建的所有''<IS_TS id=rsPomieszczenie/>'' ''<IS_TS id=PomieszczenieAutomatyczne/>'' 。</br>{{Info}} [[建筑结构的准备 - 完整的建筑结构#建筑结构计算|建筑结构计算]]。 | |||
==== | |||
====在墙上插入窗、门和墙洞==== | |||
在选择了正确的楼层平面后,插入必要的子隔墙(窗、门、墙洞等)。</br>{{Info}} [[建筑结构的准备 - 完整的建筑结构#插入窗, 门和墙上开洞|插入窗, 门和墙上开洞]]。</br></br> | |||
==其它信息== | |||
提供了几种工具用来简化多层标高的处理: | |||
* ''<IS_TS id=StoreyLevelsVisibility/>'' - 允许显示''<IS_TS id=StoreyManagement/>'' 窗口中定义的楼层和标高; | |||
* ''<IS_TS id=EdgesIn3D/>'' - 允许您将标高标记的可见性更改为虚线,反之亦然; | |||
* 标高的数值可以通过标识它,然后直接在其参数表中进行更改。<br/>[[File:楼层标高的显示和修改封面..png|900 px|left|thumb|'''[[视频:InstalSystem 5 - 楼层标高的显示和修改]]'''|link=https://www.bilibili.com/video/BV1DZ421v7k7?t]] <br clear="all"/> <br clear="all"/> | |||
[[Category:InstalSystem 5]] | [[Category:InstalSystem 5]] | ||
[[Category: | [[Category:功能和工具]] | ||
<!-- Do not write text below this tag --> | <!-- Do not write text below this tag --> | ||
<br class="iwlinks"/>[[pl:Przygotowanie | <br class="iwlinks"/>[[pl:Przygotowanie struktury budynku - Dodatkowe i wewnętrzne poziomy kondygnacji|Przygotowanie struktury budynku - Dodatkowe i wewnętrzne poziomy kondygnacji]][[en:Preparation of building structure - Additional and internal storey levels|Preparation of building structure - Additional and internal storey levels]] | ||
2026年6月12日 (五) 23:16的最新版本
| 产品 | InstalSystem 5 |
| 文章类型 | 功能和工具 |
| 版本的最新内容 | 2024-01-22 |
说明
本文描述了创建带有附加楼层的建筑结构的方法,例如,错层的客厅、相对于主楼层纵坐标偏移的楼梯平台、混合用途的建筑(例如,毗邻办公空间的健身房或储藏室)。此方法的优点是,尽管纵坐标发生了移位,但设计是在一个工作表和一个参考底图上执行的。
在程序中的位置
楼层管理
- 楼层管理 位于一般参数 窗口,建筑和环境 选型中。
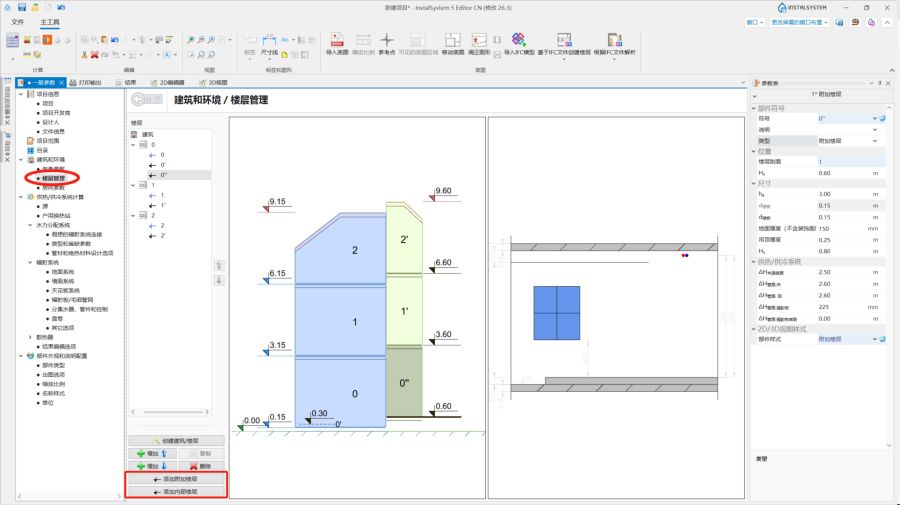
1. 楼层管理.

导入底图
- 与底图 相关的工具和功能,位于2D编辑器 窗口,并进入底图 编辑范围,在主工具 选项卡,底图 工具栏中。

2. 底图.

建筑结构
- 与建筑结构 相关的工具和功能,位于2D编辑器 窗口,并进入建筑 编辑范围,在主工具 选项卡,建筑 工具栏中。
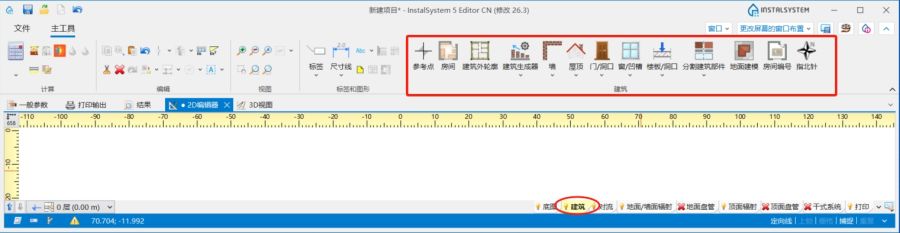
3. 建筑结构.

建筑结构的计算
- 建筑结构计算 ,位于主工具 选项卡,计算 工具栏中。
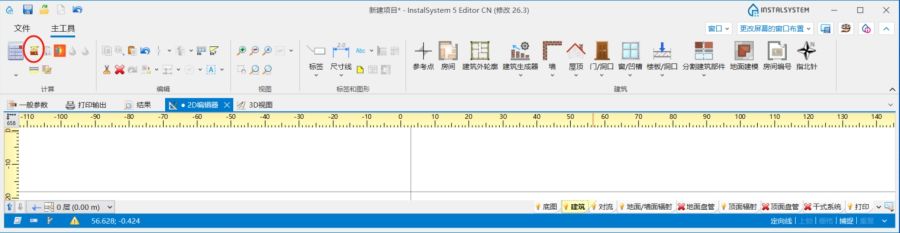
4. 建筑结构计算

应用举例
场景一:使用手动房间,创建带有附加楼层和内部楼层的简化建筑结构
创建主楼层
更多信息,见:创建建筑的楼层。
创建附加楼层和内部楼层
主楼层标高是创建用于进一步设计的附加楼层或内部楼层工作表的基础。指定给主楼层的附加楼层或内部楼层,将保留在与主楼层同一楼层上,但给出了额外的楼层标高。
创建带有不同楼层的简化建筑结构的功能位于一般参数 窗口,建筑和环境 ,楼层管理 中:
- 添加附加楼层;
- 添加内部楼层.
指定给某个主楼层的附加楼层或内部楼层的名称将在主楼层的楼层名称后,自动加上1个('),两个("),依此类推。
注: 在附加楼层 上,也可以创建内部楼层 。在这种情况下,内部楼层的上部标高将等于附加楼层的上部标高。
对于创建的楼层,指定所有必要的参数:
- 设定:H标高 - 楼层标高;
- 为附加楼层 设定:屋顶标高 ;
- 为附加楼层 设定:楼层高度 。
使用复制 功能复制主楼层,也会复制该楼层上创建的附加楼层和内部楼层,使用在上方添加新楼层 / 在下方添加新楼层 功能,仅创建新的主楼层,然后可再创建新的附加楼层或内部楼层。
注意:创建的楼层可以单独删除,也可以与主楼层一起删除。
如果有必要,可在参数表 窗口,修改如下参数:
- 楼层的类型;
- 楼层剖面 - 允许控制附加楼层和内部楼层的显示顺序。对于附加楼层,可输入正值和负值,但不能输入 0,因为该值已预留给了主楼层。.
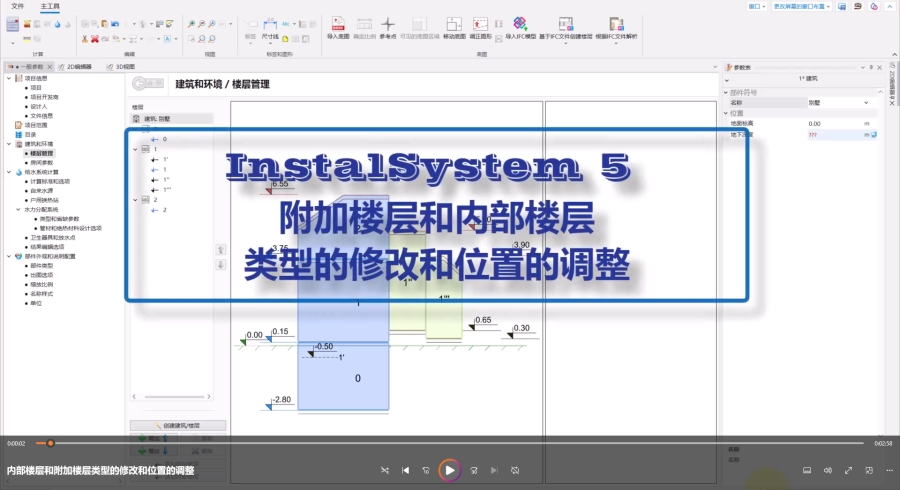
视频:InstalSystem 5 - 内部楼层和附加楼层类型的修改和位置的调整
导入底图
更多信息,见: 导入底图文件
创建房间
更多信息,见: 建筑结构的准备 - 房间布置图
- 在楼层列表中选择要将房间插入到主楼层、附加楼层,还是内部楼层;
- 插入房间。
注: 位于当前所选楼层标高之上的房间将用:绿色指示器 进行图形标记,而位于当前楼层标高之下的房间将用红色指示器
 进行标记。
进行标记。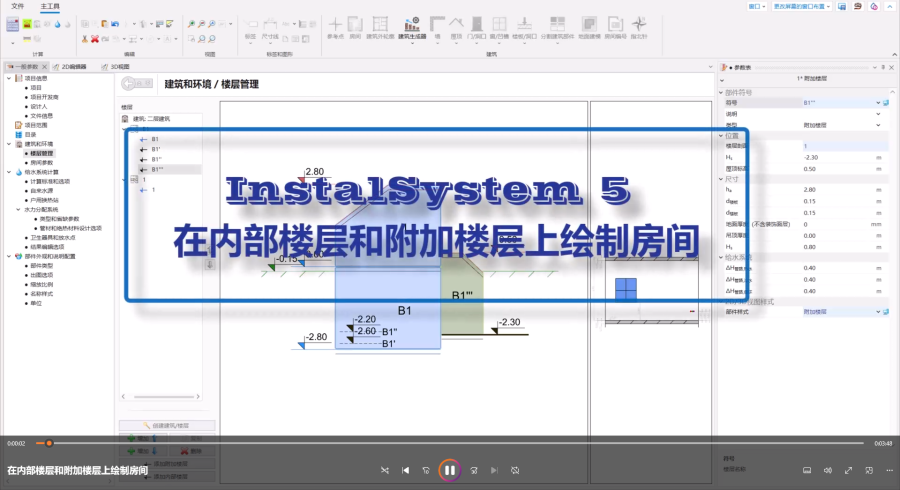
视频:InstalSystem 5 - 在内部楼层和附加楼层上绘制房间
- 如果有必要,可在其参数表 中,通过指定从楼层/至楼层 来更改它在主楼层、附加楼层或内部楼层中的位置 。
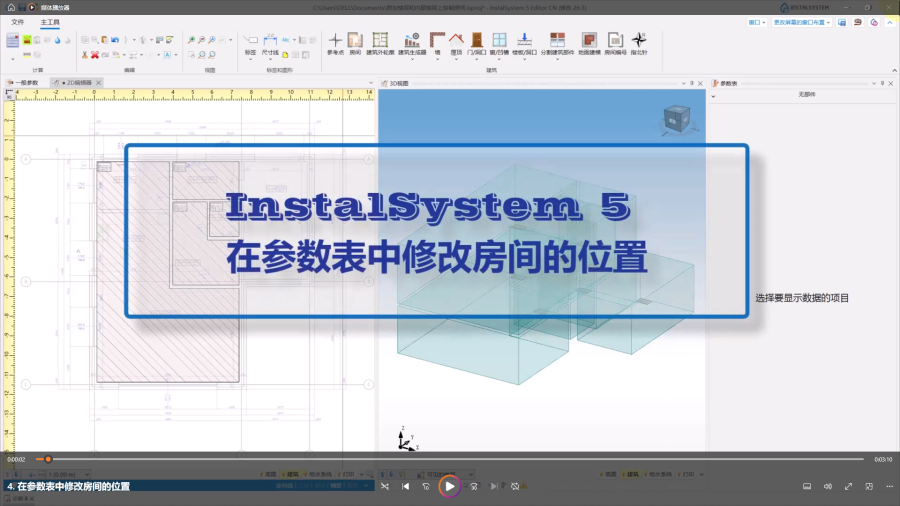
视频:InstalSystem 5 - 内部楼层和附加楼层类型的修改和位置的调整


场景二:使用建筑外轮廓和建筑生成器创建带有附加和内部楼层的完整的建筑结构
创建主楼层
更多信息,见:创建建筑的楼层
创建附加楼层和内部楼层
所执行步骤与上文 场景一:使用手动房间,创建带有附加和内部楼层的简化建筑结构 所执行的步骤相同。
导入底图
更多信息,见: 导入底图文件
创建房间
更多信息,见: 建筑结构的准备 - 房间布置图
插入 建筑外轮廓
更多信息,见: 插入建筑外轮廓
建筑外轮廓 的位置 基于主楼层的标高。
自动生成墙、楼板和屋顶
- 当进入建筑 编辑器时, 在主工具 , 建筑生成器 工具栏中可找到 自动生成墙、楼板和屋顶 功能。 它可通过所设计的房间和建筑的外轮廓由程序识别出建筑的空间来创建建筑的围护结构。
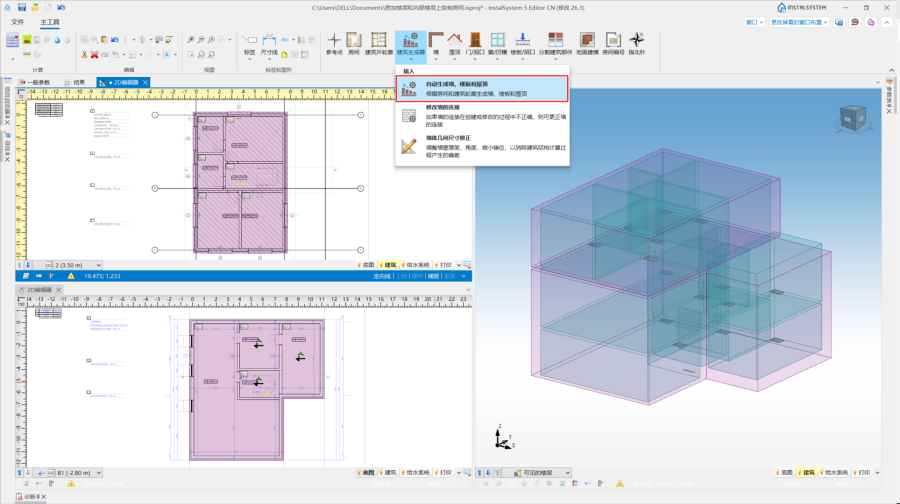
5. 自动生成墙、楼板和屋顶 - 使用分割建筑部件 功能,并在基准线 工具的支持下分割建筑结构图元(楼板、墙体或屋顶)。基准线 允许指定基准线和其他捕捉点。 分割建筑部件 是创建附加楼层和内部楼层的主要工具。其执行的正确性将取决于创建所需建筑结构的进一步路径的正确性;
- 对于楼板,更改楼层标高平面 中的楼层基准,对于墙体,更改 从楼层, 至楼层 ,对于要修改的屋顶,删除后重新绘制。
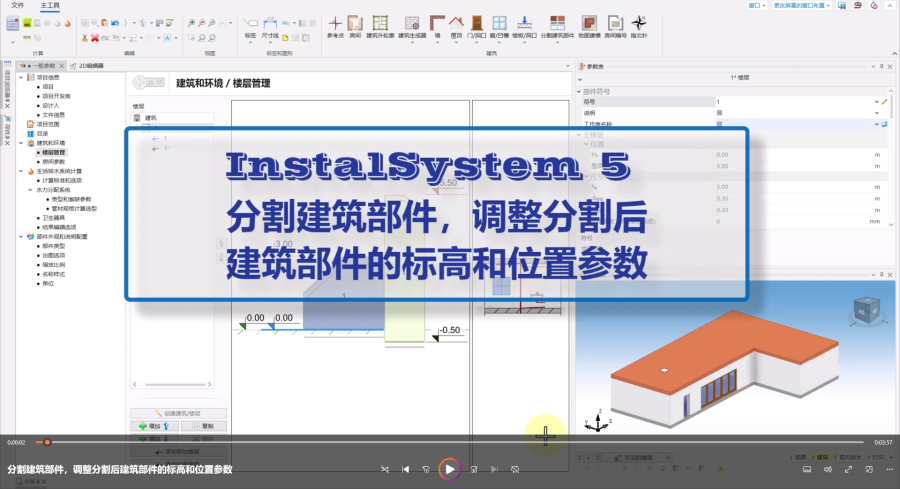
视频:InstalSystem 5 - 分割建筑部件,调整分割后建筑部件的标高和位置参数
注意: 不建议在连接处分隔墙。如果有这种情况,最佳方法是在连接处取消墙的连接,先指定墙的位置,然后再连接墙; - 使用修改墙的连接 功能。
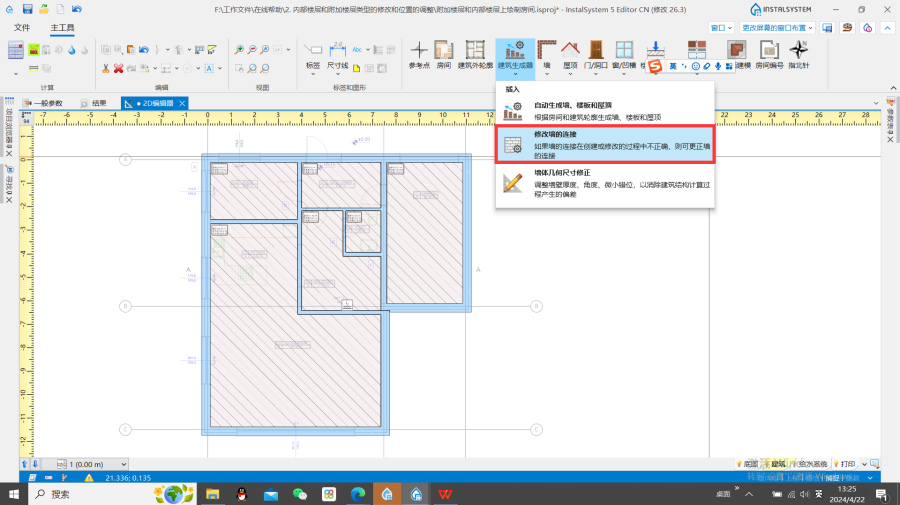
6. 修改墙的连接
注意: 我们强烈建议使用此功能,特别是在连接不同标高的墙的情况下。 - 如有必要:调整建筑构件,更改形状。


建筑结构计算
进行建筑结构计算 ,计算完成后,就可识别出由围护结构部件所包围的面积内所创建的所有房间 自动 。
更多信息,见: 建筑结构计算。
在墙上插入窗、门和墙洞
在选择了正确的楼层平面后,插入必要的子隔墙(窗、门、墙洞等)。所有插入的部件都有一个与当前所选楼层平面相关的标高。
更多信息,见: 插入窗, 门和墙上开洞。
场景三:使用手动创建的分区,创建带有附加楼层和内部楼层的完整建筑结构
创建主楼层
更多信息,见:创建建筑的楼层。
创建附加楼层和内部楼层
所执行步骤与上文 场景一:使用手动房间,创建带有附加和内部楼层的简化建筑结构 所执行的步骤相同。
导入底图
更多信息,见: 导入底图文件
插入围护结构
在所选则的楼层平面上插入围护结构 (主楼层, 附加楼层 或内部楼层)。所有插入部件均带有基于所选楼层的标高。
建筑结构计算
进行建筑结构计算 ,计算完成后,就可识别出由围护结构部件所包围的面积内所创建的所有房间 自动 。
更多信息,见: 建筑结构计算。
在墙上插入窗、门和墙洞
在选择了正确的楼层平面后,插入必要的子隔墙(窗、门、墙洞等)。
更多信息,见: 插入窗, 门和墙上开洞。
其它信息
提供了几种工具用来简化多层标高的处理:
- 显示楼层标高 - 允许显示楼层管理 窗口中定义的楼层和标高;
- 3D模型边部显示 - 允许您将标高标记的可见性更改为虚线,反之亦然;
- 标高的数值可以通过标识它,然后直接在其参数表中进行更改。
视频:InstalSystem 5 - 楼层标高的显示和修改