使用"立管"部件连接各楼层:修订间差异
跳转到导航
跳转到搜索
无编辑摘要 |
(→创建错位) |
||
| 第37行: | 第37行: | ||
# 在平面图上放置两个或多个''<IS_TS id=psnPionyKan/>'' ,并为它们分别指定''<IS_TS id=pcstrXY/>'' 和楼层范围; | # 在平面图上放置两个或多个''<IS_TS id=psnPionyKan/>'' ,并为它们分别指定''<IS_TS id=pcstrXY/>'' 和楼层范围; | ||
# | # 所有的''<IS_TS id=psnPionyKan/>'' ,应在其范围内有一个公共楼层,并在此公共楼层上创建自动连接; | ||
# 对于串联的最高''<IS_TS id=PionKanalizacji/>'' ,应指定''<IS_TS id=EndOfSewerageLine/>'' 类型,例如''<IS_TS id=pinNameRuraWywiewna/>'' ; | # 对于串联的最高''<IS_TS id=PionKanalizacji/>'' ,应指定''<IS_TS id=EndOfSewerageLine/>'' 类型,例如''<IS_TS id=pinNameRuraWywiewna/>'' ; | ||
# 对于其余的,将''<IS_TS id=EndOfSewerageLine/>'' 设置为''<IS_TS id=ZakonczeniePionuPolaczenieZPionemWyzej/>'' ,然后在''<IS_TS id=PolaczDoPionuOSymbolu/>'' 字段中选择''<IS_TS id=PionKanalizacji/>'' 符号。<br/> | |||
# 对于其余的,将''<IS_TS id=EndOfSewerageLine/>'' 设置为''<IS_TS id=ZakonczeniePionuPolaczenieZPionemWyzej/>'' ,然后在''<IS_TS id=PolaczDoPionuOSymbolu/>'' 字段中选择''<IS_TS id=PionKanalizacji/>'' 符号。 | 可以选择调整以下值: <br/>''<IS_TS id=KatOdsadzki/>'' (''<IS_TS id=KatOdsadzkiHint/>'') at which the connector is to be led out (offset);<br/>for the lower part, ''<IS_TS id=OdlegloscOdStropuPolaczeniaZPionemWyzej/>'' of the point, from which the connection will be lead out. | ||
# After checking the connections, assess the effect in the ''<IS_TS id=View3D/>'' and adjust the above data if necessary. | # After checking the connections, assess the effect in the ''<IS_TS id=View3D/>'' and adjust the above data if necessary. | ||
When carrying out the above steps, it may be more convenient that the symbols of subsequent parts are different, but once the whole element has been correctly generated, all parts of the ''<IS_TS id=PionKanalizacji/>'' with deviation can be assigned with the same symbol. <br/> | When carrying out the above steps, it may be more convenient that the symbols of subsequent parts are different, but once the whole element has been correctly generated, all parts of the ''<IS_TS id=PionKanalizacji/>'' with deviation can be assigned with the same symbol. <br/> | ||
2024年6月11日 (二) 08:43的版本
| 产品 | InstalSystem 5 |
| 文章类型 | 功能 |
| 版本的最新内容 | IS 5.0 Beta 24 |
说明
每个平面图代表一个单独的楼层,采用立管 部件就可将多个楼层平面图中的系统部件连接起来。采用这种方法,就可轻松对多层建筑中的系统进行设计和计算。每一楼层立管连接点的标高都由支管的标高决定,对于排水系统,还将使用其他楼层数据,连接后的效果可在3D视图中进行检查。
在程序中的位置
在2D编辑器 窗口,主工具 中,进入如下编辑范围,可见 立管 部件:
- 对于对流供热和供冷系统(无辐射系统部件) ,进入对流
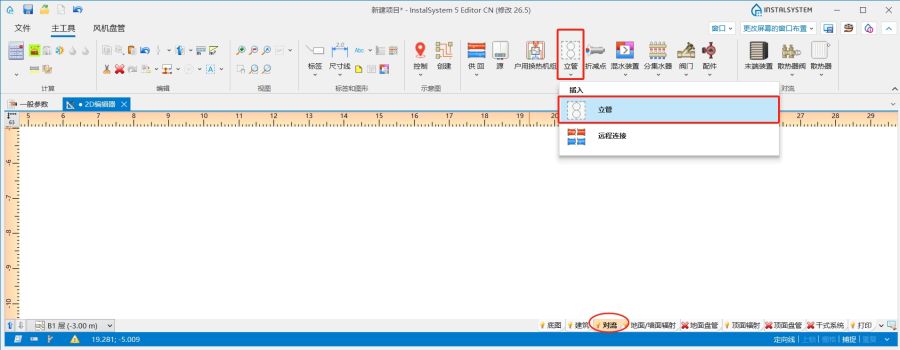
1. 对于对流系统,插入立管部件 - 对于地面和墙面辐射供暖供冷系统 ,进入地面/墙面辐射 ,对于天花板辐射供暖供冷系统 ,进入顶面辐射。
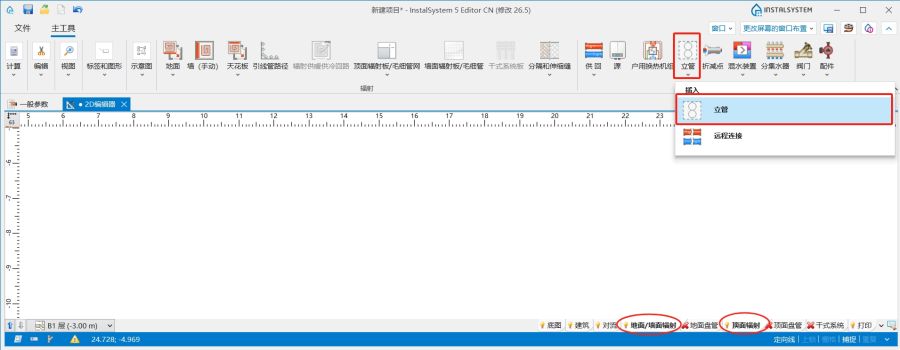
2.对于辐射系统,插入 立管部件
- 对于给水系统计算 ,进入给水系统。
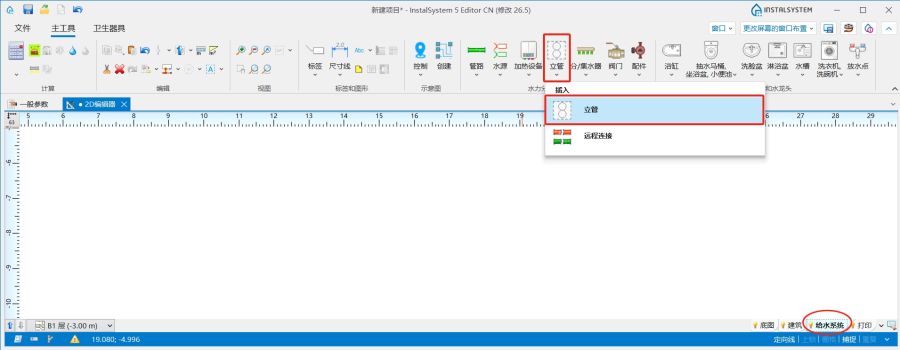
3.对于给水系统,插入立管部件 - 对于生活排水系统计算,进入室内排水
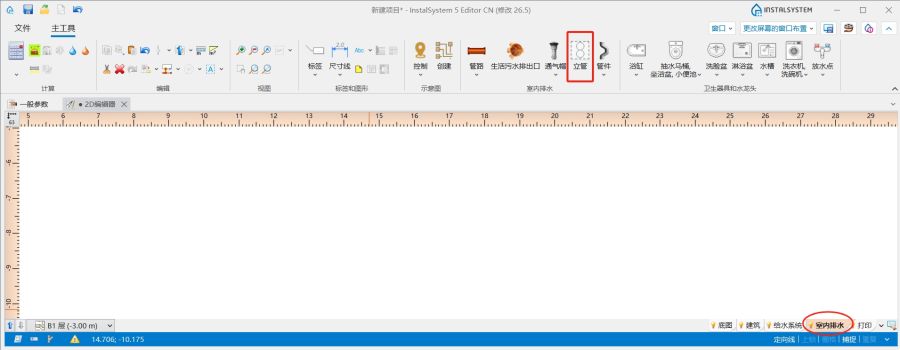
4.对于生活排水系统计算,插入立管部件


应用举例
插入穿越多层楼板的立管
- 在平面图中插入立管。
- 在参数表 中指定一符号,然后选择立管的起始楼层和终止楼层。
- 在所有楼层中使用管路 连接立管。
创建错位排水立管
在多层建筑中,排水立管在不同楼层之间通常会有排水立管 (不同的XY坐标),但应视为一个整体,包含整个的建筑。对于这种情况,应执行以下步骤:
- 在平面图上放置两个或多个排水立管 ,并为它们分别指定位置 和楼层范围;
- 所有的排水立管 ,应在其范围内有一个公共楼层,并在此公共楼层上创建自动连接;
- 对于串联的最高立管 ,应指定立管顶端的部件 类型,例如通气管 ;
- 对于其余的,将立管顶端的部件 设置为连接至上方的立管 ,然后在所连接的立管符号 字段中选择立管 符号。
可以选择调整以下值:
偏移角度 (垂直方向偏移角) at which the connector is to be led out (offset);
for the lower part, 立管上方的拐点至天花板的距离 of the point, from which the connection will be lead out.
- After checking the connections, assess the effect in the 3D视图 and adjust the above data if necessary.
When carrying out the above steps, it may be more convenient that the symbols of subsequent parts are different, but once the whole element has been correctly generated, all parts of the 立管 with deviation can be assigned with the same symbol.
This procedure applies only to 排水立管 without parallel ventilation.